INSTRUCTIONS FOR
Integrating your PrestaShop store with Price2Spy
Please follow the simple steps shown below.
Instructions
STEPS IN PRESTASHOP – PART 1
Please login to PrestaShop, and do the following:
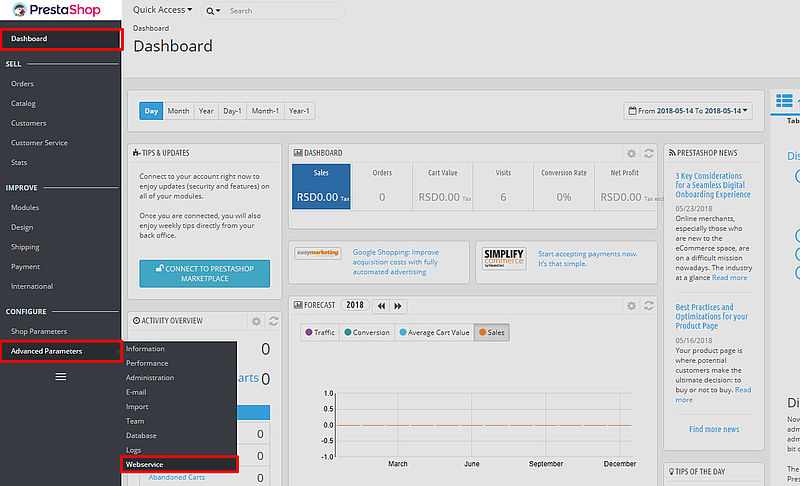
- In the left-side menu go to Selecting Webservice
- Go to Dashboard > Advanced Parameters
- Select Webservice
- In the Configuration section do the following:
- Select Enable PrestaShop’s webservice - YES
- Select Enable CGI mode for PHP - YES
- Once you have set up the Configuration section, click on the 'Save' button.
- In the WEBSERVICE section click on 'Add New'. This will create a new webservice account.
STEPS IN PRESTASHOP – PART 2
In the WEBSERVICE ACCOUNTS tab do the following:
- Click on the 'Generate' button to generate key.
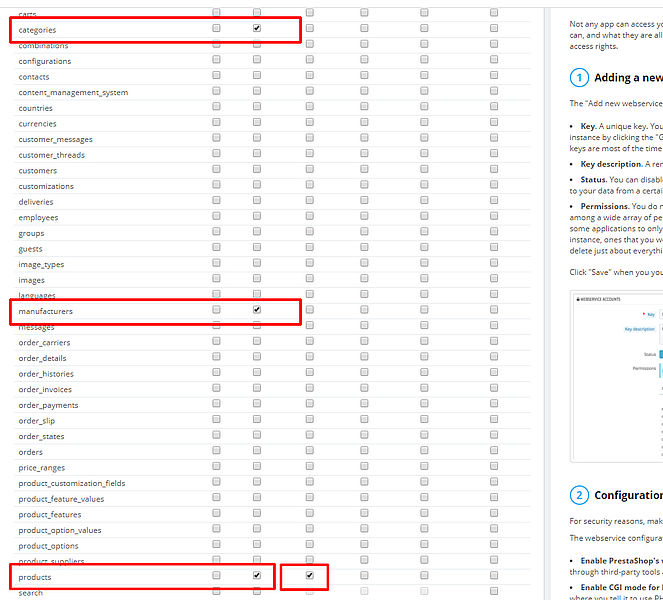
- Select checkbox View (GET), to select unnecessary permissions for “GET” operation for next resources:
- categories;
- manufacturers;
- products;
- specific prices;
- stock availabilities;
- suppliers;
- taxes;
- combinations;
- Select checkbox Modify (PUT) for next resource:
- products;
- Click the 'SAVE' button.
STEPS IN PRICE2SPY – PART 1
Once in Price2Spy interface, do the following:
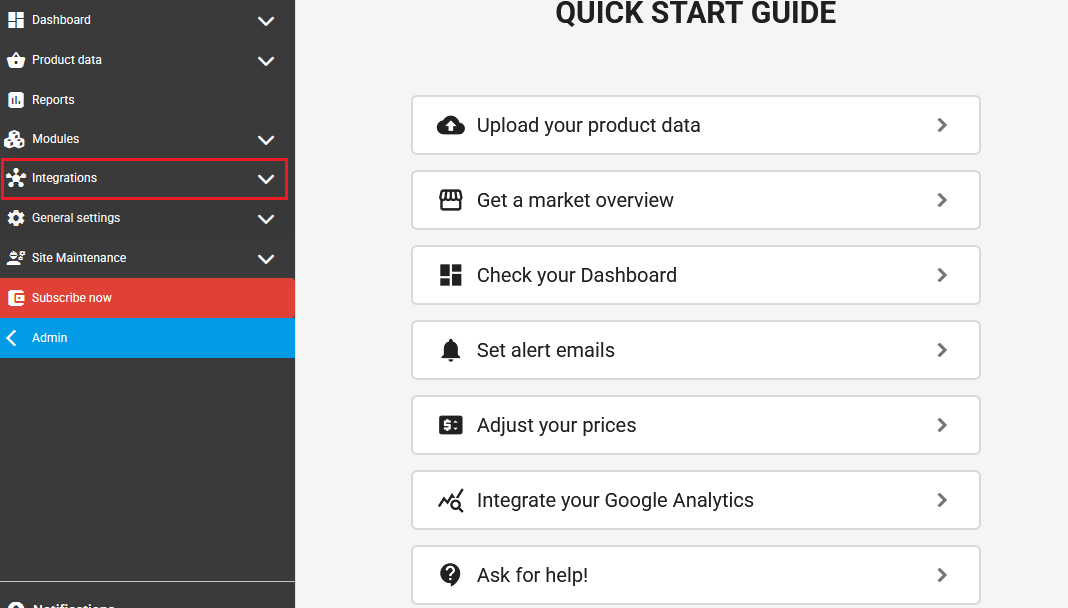
- In the left-side menu click on Integrations.
- In the Integrations submenu, click on Link My Store.
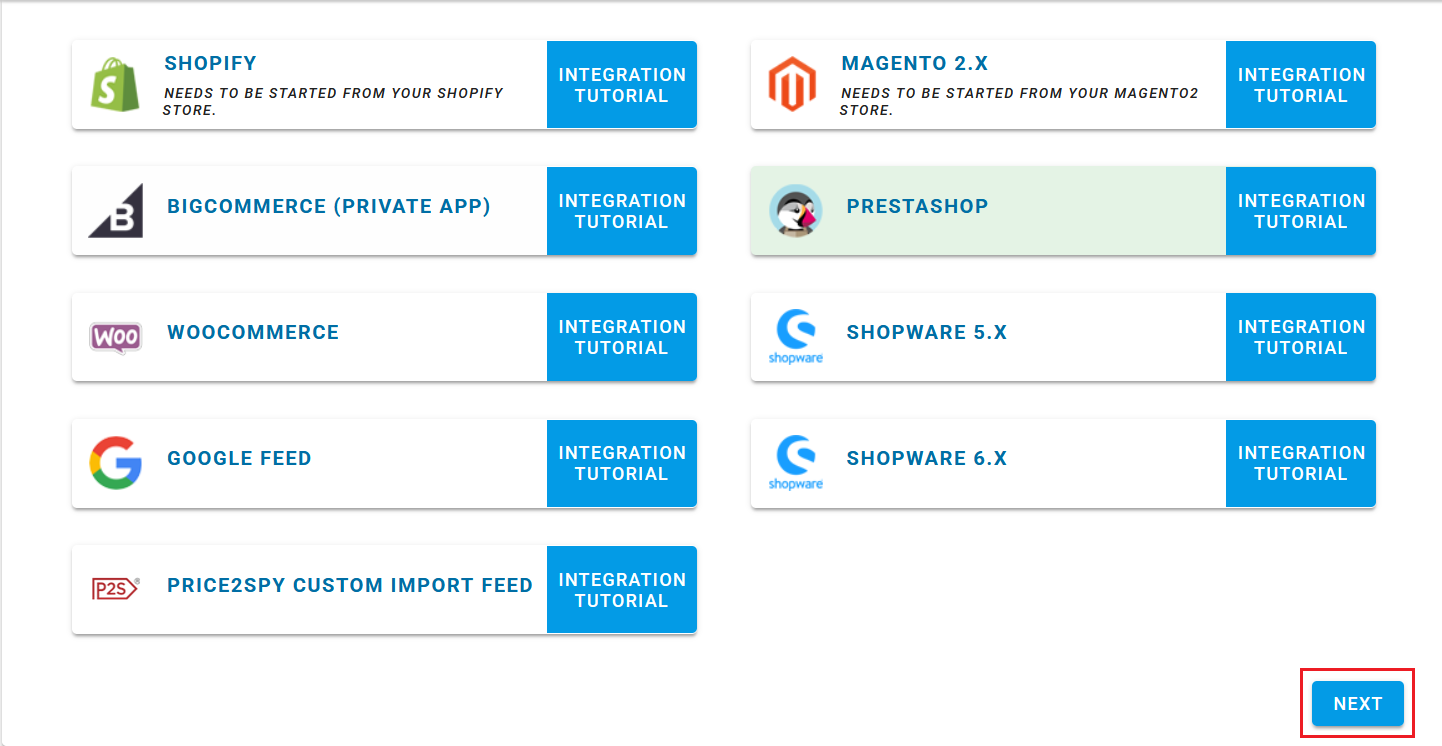
- On the following screen, select PRESTASHOP.
- Click on 'NEXT'.
STEPS IN PRICE2SPY – PART 3
- In Step 3 of the integration process you choose which categories you want to sync with your Price2Spy account.
- Do this by expanding the dropdown menu by clicking on the down-pointing arrow (as noted in the image).
- Once expanded, select all the categories you want to sync.
- Before clicking on 'NEXT' you may check how many products will be synced with your Price2Spy account by clicking 'CHECK'.
- Click on 'NEXT' to go to the next step of the integration process.
STEPS IN PRICE2SPY – PART 4
- In Step 4 of the integration process you set the following parameters:
- Store execution frequency - decide how frequently (the default value is once per day) and at what time you want store executions to be performed.
- Price check frequency - decide how frequently you want the price checks to be performed (of the products created via Link My Store Operation).
- Email notifications - decide whether you want to receive email notifications about store executions and price checks.
- Click on 'FINISH' to complete the integration process.
Troubleshooting
- Network/Firewall issues - In many cases, we experience that client’s Web server is behind a firewall, which will block our requests. Therefore, please make sure that you have done the following whitelisting changes to your firewall:
- Whitelist specific countries: please white list Serbia and The Netherlands.
- Whitelist user-agent: ReactorNetty.
- Request rates - If your store contains a large number of products, Price2Spy will have to make a large number of requests to your Web server in order to perform the syncing..
- If a large number of requests is problematic for your Web server – please contact support@price2spy.com and we will spread the requests over a longer period of time
- In case you’re not sure where to apply the above firewall changes, please get in touch with your hosting company. If you’re unsure whom to contact, please let us know, we’ll be happy to point you in the right direction.
Basic info
- All product-related columns (product name, SKU, internal ID, custom fields, metadata, brand, supplier, and category) can have up to 250 characters.
- Comment fields support 4GB (4,294,967,295 characters).
- URL is limited to 2,000 characters.
- The following fields can contain 65,535 characters (64 KB): note1, note2, note3, image1Url, image2Url, and image3Url.


